While I was working on Inner Alliance, I needed to implement a fog of war but I realized a simple 2D screen effect wouldn’t cut it when we had a dynamic 3D camera. That led me down the path of raymarched fog. Here, we’ll take a look at how I built it in Unity URP.
Intro to Ray Marching
Raymarching is a powerful rendering technique that casts rays from the camera and steps along them to sample shapes or volumes. Instead of relying on complex meshes, it uses signed distance functions (SDFs) to represent objects like spheres, fog, or clouds.
For example, imagine drawing a flashlight beam in a dark room. At each step along the beam, you check how far you are from the nearest object. If you’re close enough, you stop—because you’ve “hit” something. This is how a shader figures out what to draw, using math instead of detailed 3D models.
Key Equations
Ray Path: \(\mathbf{O}\) is the camera, \(\mathbf{D}\) is the ray direction, \(t\) is the distance. \[ \mathbf{P}(t) = \mathbf{O} + t \cdot \mathbf{D} \]
Sphere SDF: For a sphere at \(\mathbf{C}\) with radius \(r\): \[ \text{SDF}(\mathbf{P}) = |\mathbf{P} - \mathbf{C}| - r \] Negative = inside, zero = surface, positive = outside.
Marching Step: Step by the SDF value: \[ t \gets t + \text{SDF}(\mathbf{P}(t)) \] Stop when \(\text{SDF} < \epsilon\) or you exit.
For a more in-depth look at how this all works and some cool examples, checkout this fantastic post by Michael Walcyk.

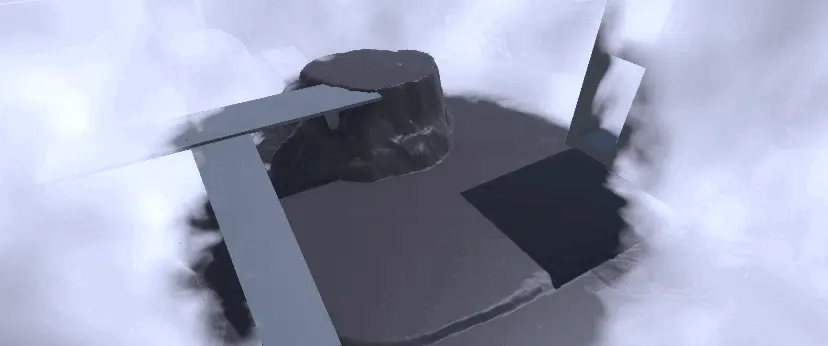
Sphere raymarched in a cube with an SDF.

Sampling from a 3D cloud texture instead of an SDF.
Fog Shading Approaches
When approaching fog a referenced a bunch of resources (along with some AI assistance). Here are some the key ones that I found most helpful!
https://blog.maximeheckel.com/posts/real-time-cloudscapes-with-volumetric-raymarching/ https://shaderbits.com/blog/creating-volumetric-ray-marcher https://github.com/GarrettGunnell/CS2-Smoke-Grenades https://www.youtube.com/watch?v=hXYOlXVRRL8
Let’s take a look at some of the results.
Texture-Based Shadows
I started by layering simplex noise for both density and “fake” shadowing. Imagine two wispy noise textures overlapping to give depth.
// Sample shader snippet for texture-based fog
float noiseDensity = snoise(worldPos * densityScale);
float shadowMask  = snoise(worldPos * shadowScale);
float fogAmount   = smoothstep(minDist, maxDist, length(rayDir)) * noiseDensity;
Color             *= fogAmount * (1 - shadowMask);

Fog rendered with texture-driven shadows—stylized but quite noisy.
In practice, the look was interesting but too busy: the scene felt like it was pulsing rather than smoothly fading. Performance was good since I could just encode multiple noise textures onto multiple channels in the texture so it only required a single sample per fragment.
Rayleigh Scattering (Single-Scattering)
Next, I found a way to mimic light scattering a video by Acerola. We calculate light scattering based on the angle between your view ray and the main light along with some constants.
$$ I(\theta) \propto 1 + \cos^2\theta $$ Rayleigh scattering models light scattering intensity based on the angle \(\theta\) between the view and light directions, creating a realistic fog glow.
// FogPostProcess.hlsl
float RayleighScattering(float3 cameraRay, float3 lightDir)
{
    float3 up             = float3(0, 1, 0);
    float heightInfluence = saturate(dot(-lightDir, up));
    float cosAngle        = saturate(dot(normalize(cameraRay), normalize(lightDir)));
    float intensity       = pow(heightInfluence, 0.5) * (1 + cosAngle * cosAngle);
    return THREESIXTEENTHPI * intensity;
}

Fog rendered with Rayleigh scattering. More natural and reacts to scene lighting.
Building the URP Post-Processing Pass
To get volumetric fog working, we need two things: scene depth data and the camera view matrix. Post processes are screen space and don’t have world space data so we need to generate that data ourselves.
This is using Unity 6’s new render graph api which honestly gave me a bit of a hard time with limited resources because it’s so new. Luckily the sample code that Unity provides helps a lot especially with setting up basic blitting.
- Enable Depth Texture in your URP asset settings.
- Reconstruct World Positions in the shader:
float3 GetWorldPosition(float2 uv, float depth)
{
    float4 clip = float4(uv * 2 - 1, depth, 1);
    clip.y    = -clip.y;
    float4 world = mul(_InverseVP, clip);
    return world.xyz / world.w;
}
Render Graph Workflow
- Calculate the camera view-projection matrix and pass into the shader
- Pass 1: Raymarch fog into a temporary texture.
- Pass 2: Blit the result back to the camera target.
// FogPostProcessRenderPass.cs
public override void RecordRenderGraph(RenderGraph renderGraph, ContextContainer frameData)
{
    ...
    // Compute matrices
    Matrix4x4 viewProj = GL.GetGPUProjectionMatrix(camera.projectionMatrix, true) * camera.worldToCameraMatrix;

    var tempTextureDesc = new TextureDesc(cameraData.cameraTargetDescriptor) {
        depthBufferBits = 0, name = "FogTempTexture"
    };
    TextureHandle tempTexture = renderGraph.CreateTexture(tempTextureDesc);

    // Pass 1: Render fog into temp texture
    using (var builder = renderGraph.AddRasterRenderPass<FogPassData>(ProfilerTag + "_ToTemp", out var passData))
    {
        ...
        builder.SetRenderFunc((data, rgContext) => {
            var cmd = rgContext.cmd;
            cmd.SetGlobalMatrix(InverseViewProjectionID, data.InverseViewProjection);
            cmd.SetGlobalVector(CameraPosID, data.CameraPos);
            Blitter.BlitTexture(cmd, data.Source, new Vector4(1, 1, 0, 0), data.Material, 0);
        });
    }

    // Pass 2: Copy back to camera
    using (var builder = renderGraph.AddRasterRenderPass<CopyPassData>(ProfilerTag + "_ToCamera", out var passData))
    {
        ...
        builder.SetRenderFunc((data, rgContext) => {
            Blitter.BlitTexture(rgContext.cmd, data.Source, new Vector4(1, 1, 0, 0), 0, true);
        });
    }
}
Tip: Always double buffer to a temporary texture first—writing directly to the camera buffer can lead to race conditions.
Tackling Raymarch Banding
Raymarching with constant steps can leave noticeable bands. To fix: jitter the start of each ray with some blue noise.

Raymarch step increments creating uniform bands at each density test.

After adding a small noise offset, the bands smoothed out into a natural gradient.
Trying Voxel-Based Fog
Previously, I had implemented scene voxelization in Inner Alliance so I thought I could use that data to help me shape the fog around the scene geometry. My voxel data exists as a 1D array of bools that I index as a 3D array.
I convert that into a structured buffer and pass that directly to the shader properties.
int VoxelBufferID = Shader.PropertyToID("_VoxelDataBuffer");
GraphicsBuffer _fogBuffer = new GraphicsBuffer(GraphicsBuffer.Target.Structured, grid.VoxelCount, sizeof(float));
Shader.SetGlobalBuffer(VoxelBufferID, _fogBuffer);
For each of the raymarch rays, I do a bounding box AABB intersection and discard any rays that don’t intersect the bounding box. For the ones that do intersect, I then march through the box and sample from the voxel grid to determine the densities at each step. Lastly, add some noise sampling to give a bit of texture to the fog.
for (int step = 0; step < _MaxSteps; ++step) {
    float3 currentPos = rayOrigin + rayDir * current_t;
    float density = SampleDensityFromVoxels(currentPos);

    if (density > EPSILON)
    {
        float scaledDensity = density * _DensityScale;
        float alpha = 1.0 - exp(-scaledDensity * _Absorption * stepSize); // Apply Beer's law to get fog alpha
        ...
        // Visual Tuning
    }
    current_t += stepSize;
    if (current_t > t_far) break;
}

Voxel-based volumetric fog using intersection and voxel sampling.
At this point, I stopped due to performance issues with voxel-based fog calculations. Below are the key benefits and drawbacks of this approach, and why I pivoted to post-processing for fog of war.
Potential:
- Precise Control: Voxel data shapes fog to match scene geometry or game regions (e.g., dense fog in specific areas).
- Data Integration: Supports precomputed or simulation-driven effects, aligning with level design or dynamic systems.
Drawbacks:
- High Memory Usage: Large voxel grids (e.g.,
_VoxelDataBuffer) consume significant memory. - Performance Overhead: Sampling the structured buffer and noise texture in the raymarching loop is costly, especially for high-resolution grids or many steps.
- High Memory Usage: Large voxel grids (e.g.,
Ultimately, for a fog of war effect requiring efficient screen-space occlusion, post-processing offered better performance than raymarching.
Wrapping Up
- Lessons Learned:
- Learned about raymarching and voxel-based rendering, deepening shader programming skills.
- Gained insights into balancing visual fidelity and performance in resource-constrained environments.
- Understood trade-offs between voxel-based and procedural methods, guiding future effect design.
- Had a lot of fun!