What is Responsive Combat
Whether it’s an attack, dodge, or block, responsive combat ensures each feels immediate and with appropriate feedback. Games like Hades got this nailed down to a tee. Attacks feel punchy with minimal delay and the player rarely feels like their fighting with the controls to get the game to do what they want. By providing precise control over the character’s abilities, responsive combat enhances the sense of agency and satisfaction, leading to more intense and rewarding gameplay experiences.
Input Queuing
When inputs are timing dependent, you can run into the situation where inputs don’t register because the inherent imprecision of humans. For example, we previously talked about combo attacks where one input leads to the other. Depending on the speed of the combo there’s a certain time window between the first and second attack where the player cannot attack. Then at the exact minute picosecond that the time windows passes, the player is able to attack.
Two things can happen on the second attack input:
The player attacks late
The player will be able to attack but they’re attacking slower than it is possible. Ideally, if you want to attack at full speed, you need to attack on the precise frame that the first attack window ends. This is incredibly difficult and unreasonable to expect from the player.
The player attacks early
Even if they’re attacking one frame too early, the attack won’t register as we’re still in the time window of the first attack. Of course, the player can just input again but it’s already disorientating to have an input not register when you expect and you’ll likely end up back in aforementioned late attack situation.
We can solve this be queuing inputs. This involves holding the player’s input for a short timeframe so it still registers within that window. For example, let’s say we input queue for 0.3 seconds. If we click attack 0.1s before the attack is available, then 0.1s later, the input will still be registered as we’re still running that input by the time we can attack.
This fixes our issues as we’re now giving the player a window of *input forgiveness where as long as they perform the input within 0.3s, they will get the full expected outcome.
It’s important to set the input queuing window to a reasonably low value (ex. 0.2s < t < .0.5s) otherwise inputs can start to feel too delayed. Imagine clicking an attack when it isn’t available and then having it attack 2 seconds later!
Let’s implement general input queuing!
The simplest version of input queuing involves repeating an input until it succeeds. I’m using the new input system which typically involves hooking a callback function to the input event like this.
PlayerInputActions _inputActions;
_inputActions.Player.Attack.performed += Attack;
Instead of hooking the Attack function directly. Let’s create a middleman function that calls Attack and queues it.
using InputContext = UnityEngine.InputSystem.InputAction.CallbackContext; // For brevity

Action<InputContext> attackQueuedAction = e => QueueInput(_weaponController.Attack, e);
private void QueueInput(Func<InputContext, bool> inputCallback, InputContext e)
{
    // Queue the function
}
Technically we could just assign the lambda function directly to
_inputActions.Player.Attack.performedto save lines. The reason we create a newAction<InputContext>is so we have a reference for later checks and if we want to remove the callback from the event.
Remember the goal here is to keep trying the input for a short interval of time until it either succeeds or the time passes. To do this, we’ll decide an inputQueueDelay to repeat an input for a specified time and repeat the input using a coroutine.
public float inputQueueDelay = .3f;
Action<InputContext> queuedAction;


private void QueueInput(Func<InputContext, bool> inputCallback, InputContext e)
{
    StartCoroutine(QueueInputCoroutine(inputCallback, e));
}

IEnumerator QueueInputCoroutine(Func<InputContext, bool> inputCallback, InputContext e)
{
    float timer = 0;
    while (timer < inputQueueDelay)
    {
        inputCallback(e)
        timer += Time.deltaTime;
        yield return null;
    }
}
We now have some basic input queuing setup. There’s a still a couple more things to do. If we happen to queue inputs too quickly, we want to refresh the previous input queue rather than having two run simultaneously. Additionally, if the input succeeds, the queuing should stop otherwise we may get repeat inputs.
First thing we need is a way to track what inputs are currently being queued. Here I’m using Unity’s new input system, so I’ll create a dictionary to keep track of what inputs we’re currently queuing.
private Dictionary<Func<InputContext, bool>, InputContext> QueuedInputMap = new Dictionary<Func<InputContext, bool>, InputContext>();
Next, we’ll add an input to the map whenever we start a new queue and replace it if it already exists. We also check if the method returns true to exist out early from the coroutine.
private void QueueInput(Func<InputContext, bool> inputCallback, InputContext e)
{
    if (!QueuedInputMap.ContainsKey(inputCallback))
    {
        StartCoroutine(QueueInputCoroutine(inputCallback, e));
    } else {
        QueuedInputMap.Remove(inputCallback);
        StartCoroutine(QueueInputCoroutine(inputCallback, e));
    }
}

IEnumerator QueueInputCoroutine(Func<InputContext, bool> inputCallback, InputContext e)
{
    QueuedInputMap.Add(inputCallback, e);
    float timer = 0;
    while (timer < inputQueueDelay)
    {
        if (!QueuedInputMap.ContainsKey(inputCallback)) StopCoroutine();

        if (inputCallback(e))
        {
            StopCoroutine();
        } else
        {
            timer += Time.deltaTime;
            yield return null;
        }
    }
    QueuedInputMap.Remove(inputCallback);
}
Attack Interrupts
For systems like comboing, inputs lead to some running animation that must play and will likely lock out the player from inputs. Locking out the player for some time is necessary otherwise the player would constantly skip animations and be able to sequence attacks instantaneously.
However, it’s usually a bad idea to lock players in for the entirety of an animation. For example, a standard attack animation typically has the attack itself followed by some sort of follow through. This is just the animation of the player returning back to their idle state. If we force the player to wait for the whole animation, every single attack will not only take too long but also feel awkwardly seperate. Imagine taking out your sword to attack 3-times but needing to sheathe your sword between every attack.
We could just chop off the end of the animation but you likely want to have an ending animation for single attacks or last attacks in a sequence.
The solution is to give a window for the player to perform another action while the current action is running, effectively interrupting the current animation. In code, we can expose two function for checking whether we’re able to interrupt and a function for actually interrupting an attack.
public bool IsInterruptable()
{
    // Check if the attack is interruptable
}

public bool InterruptAttack()
{
    if (IsInterruptable()) {
        // Interrupt attack e.g. cancel animation, reset combo, etc.
    }
}
Attack States
We talked about melee attacks having different states with some states being interruptable. Let’s codify all the states of a melee attack.
public enum AttackState
{
    WIND_UP,
    ACTIVE,
    WIND_DOWN, // This state should be interruptable
    INACTIVE
}
Depending on your game, you may have more states than this like sheathing/unsheathing a weapon or maybe a charge state. This may change the later code examples but the structure should largely work.
Now that we have states, we can assign one of these states to a variable so we know where in the attack animation we are. We can do this in multiple ways such as adding an event using the animator to or using a timer to wait for the correct intervals. I’ll give an example of what it may look like using a Coroutine for an attack.
public class AttackMove
{
    public AnimationClip clip;
    public float animationOffset; // When the attack starts in the animation
    public float duration = 0.5f; // How long the attacks lasts
    public Vector2 direction;
    public float damageMultiplier = 1.0f;
    public float rangeMultiplier = 1.0f;
    public float knockbackMultiplier = 1.0f;
}

private IEnumerator PerformAttack(AttackMove move)
{
    currentAttackState = AttackState.WIND_UP;
    SetupAttackAnimation(move);

    // Start attack
    _animator.SetTrigger(attackStartTriggerHash);
    yield return new WaitForSeconds(move.animationOffset);

    currentAttackState = AttackState.ACTIVE;
    yield return new WaitForSeconds(move.duration);

    currentAttackState = AttackState.WIND_DOWN;
    yield return new WaitForSeconds(move.clip.length - (move.animationOffset + move.duration));
    currentAttackState = AttackState.INACTIVE;
}
Now that we have the states currently assigned, all we have to is to only allow an attack when we deem the current attack state to be interruptable.
public bool IsInterruptable()
{
    return currentAttackState == AttackState.INACTIVE ||
        currentAttackState == AttackState.WIND_DOWN;
}

public bool InterruptAttack()
{
    if (IsInterruptable()) {
        if (_animator.GetCurrentAnimatorStateInfo(0).shortNameHash == attackStateHash)
        {
            _animator.CrossFade(baseStateHash, 0.0f);
        }
        return true;
    }
    return false;
}

public bool Attack()
{
    if (InterruptAttack()) {
        StartCoroutine(PerformAttack(CurrentWeapon.attackMoves[_attackMoveIndex]));
        return true;
    }
    return false;
}
The beauty of this system is you can freely alter when we can interrupt out of attacks for any moves. For example, in our game we have a dash move that original could only interrupt attacks during the WIND_DOWN state since that’s how it worked for attacks. It turned out this felt clunky and we wanted it to be interrupted even earlier. All we had to do was write another IsInterrupted function for dashes that allows more states to return true and use that when checking for whether we can dash.
public bool IsDashInterruptable()
{
    return currentAttackState != AttackState.WIND_UP;
}
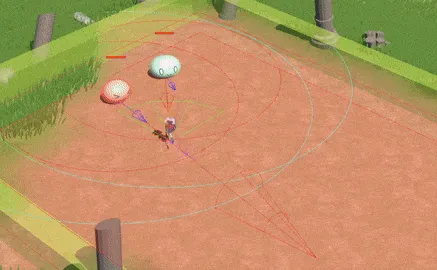
Stylized Melee Hitboxes
I’ve been continuing work on Slime Hunter which uses a top-down perspective for combat. One of the challenges with melee combat is how to deal with hitboxes for the player’s attack. For realistic games, it’s often enough to just attach a collider to the player’s weapon. The problem comes with stylized combat that focuses on weapon trails to indicate hitboxes.
Here’s an example from the amazing Hades 2:
Instead of the model of the blade impacting with the enemy, the hitbox is determined by the trail left by the weapon. There’s a few qualities to note.
- It appears instantly
- The weapon animation skips between the wind up and wind down
- Its size is irrespective to the weapon
- It changes between combos
The classic collider approach won’t work as the animation doesn’t have enough frames for the collider to cover the entire curve. Additionally, we want the collider to cover an instantaneous area for the whole attack rather then following a rotation.
Approach #1: Convex Meshes

This approach involves dynamically generating points in the shape of the curve and using those points to generate a collision mesh. Because of a convex mesh, Unity will generate an approximating bounding collider that approximates the shape of the points and uses that for collision.
The Benefits
- Decent efficiency from minimal points and single collider
The Drawbacks
- Despite the collider being a box, Unity will not perform AABB collision but the less efficient mesh collision
- Doesn’t accurately represent the curve shape
As can be seen above, the bounding collider ends up just being a box anyways. We might as well have just used a box collider to begin with.
Approach #2: Repeated Box Curve

This approach is simlilar to the convex mesh in implementation but instead of building the curve using points, we use a set of box colliders to build up the curve. We can use more boxes to get closer to the ideal curve shape. 4 boxes in my case seemed to be plenty accurate
The Benefits
- We get an overal hitbox that can get pretty close to the curve
The Drawbacks
- Using multiple box colliders is pretty inefficient
Approach #3: Sphere Angle Cutoff
This approach takes advantage of the fact that sphere colliders are quick and already perform most of the collision calculations that we need. Whenever we get a collision within the sphere all we need to check is that the collision happens within an angle range and (if we want) we can check the collision happens in a height range as well.
I’ve yet to implement this design for now. When I have some time, I’ll get to implementation update my results again here!